Designing a Seamless Tutorial. Case Study of "Guiding Light"
- Mike Galinski
- Game production
- July 30, 2024
Games take different approaches to teaching players how to play. Some provide explicit tutorials before the game starts, some offer no guidance, leaving players to figure out the mechanics on their own (or check a wiki), and others teach players seamlessly as they play. During the development of our game, “Guiding Light”, we decided that we need the latter approach.
What Is a Seamless Tutorial and What Is This Text About
A “seamless tutorial”, in our case, is “a tutorial you don’t feel is a tutorial.”
This text is a case study of a game I coworked on for the courses conducted by Lodz University of Technology, and depicts our design path, assumptions, conclusions, what worked out, and what could be done better. It will be easier for you to follow the text if you get to know “Guiding Light” first (you can even download and play it).
“Guiding Light” is a game in which you’re a lighthouse keeper in the Pole of Cold. It’s a casual time-management game, and your goal is not only guiding ships in a stormy night, but also collecting their cargos to feed hungry penguins!
Why We Wanted Seamless Tutoring
The main reason our game needed a seamless tutorial was that we were presenting the demo during short hands-on sessions. “Guiding Light” was destined to be showcased at the ZTGK 2024 Gamedev Contest, meaning the jury members had only a few minutes to play and talk with us at our stand. The game had to be both clear and fun from the very first seconds.
We deeply analyzed the nature of our game and circumstances, and concluded that:
Conclusion
Without tutoring, “Guiding Light” would be unclear and frustrating. With a traditional tutorial, it could be less fun, immersion-breaking, or cluttered with too much text.
And we simply found such tutoring elegant and fitting our game.
Case Study of “Guiding Light”
Now let me present elements of game design we decided to apply to teach players how to play, but to keep the experience fun, approachable, immersive, and seamless.
We Taught the Player Sooner Than Expected
We applied the first element of tutoring earlier than some might think… in the main menu. The first thing we wanted to teach players was that in our game they control a beam of light with a mouse. Take a look at our menu:

Fancy, simple, and players got it subconsciously. And the game hasn’t even started yet! We aimed to highlight something really important – controlling the light, the absolute basics. It turned out, we didn’t need a single word, image, or animation for it, as our tests proved it is clear for the players. This is where we came to these conclusions:
Conclusion
We managed to teach players subconsciously here by designing the basics (main menu) in a gameplay-supportive way.
Conclusion
If some things could be explained without a single word, we didn’t use any. We seeked the most simple solution for explaining our gameplay.
To support this, I would like to show examples from other games that do similar things:
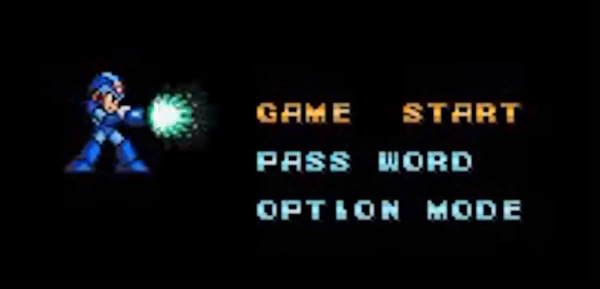
| “Fruit Ninja” main menu | “Mega Man X” main menu |
|---|---|
|
|
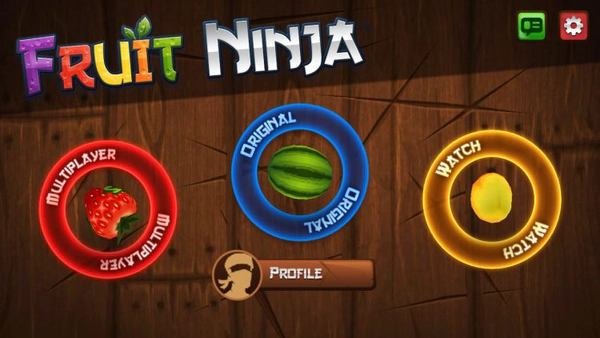
In case of “Fruit Ninja” you need to cut a fruit to choose an option in the main menu. What a beautiful way to highlight the main thing you do in the game! I suspect there could be a fraction of players that would try to press a fruit instead of cutting it. In that case such menu lets them learn how to perform the most basic action in the game.
“Mega Man X” main menu has a little Mega Man as a “cursor”. When choosing an option, Mega Man fires a blast. This highlights that Mega Man can fire projectiles.
Tutoring Was No Exception to the Gameplay Loop
“Guiding Light” consists of six levels. This means that gameplay loop is closed inside every level. So a tutorial that is detached from the rest of the levels (i.e. you do stuff to learn how to play before you enter the main game) would be a major inconsistency. We wanted to keep the gameplay loop consistent between the levels and present just the game with six levels. Not a game with “a tutorial + three levels.” It also supported introducing new mechanics gradually, level by level.
The solution was to make the first three levels introductory – gradually building the level of complexity. The formula was something like this:
- Level 1: explaining controls + context + gameplay loop
- Level 2: explaining new type of ship + the first ability + gameplay loop
- Level 3: upgrades + enemies + gameplay loop
In the rest of the levels (4-6), the players are on their own and need to utilize everything they learned during levels 1-3. Most importantly, the gameplay loop remains consistent. Playtests showed that players didn’t feel like they were “inside a tutorial” previously and are finally in the game starting from level 4.
The micro loop in “Guiding Light” was built around guiding the ships to the port and the macro loop around guiding enough food ships to the port so all the penguins are fed, and the level is completed.
Conclusion
We wanted to ensure that each level mirrors the gameplay loop. Even in “directed tutoring levels.”
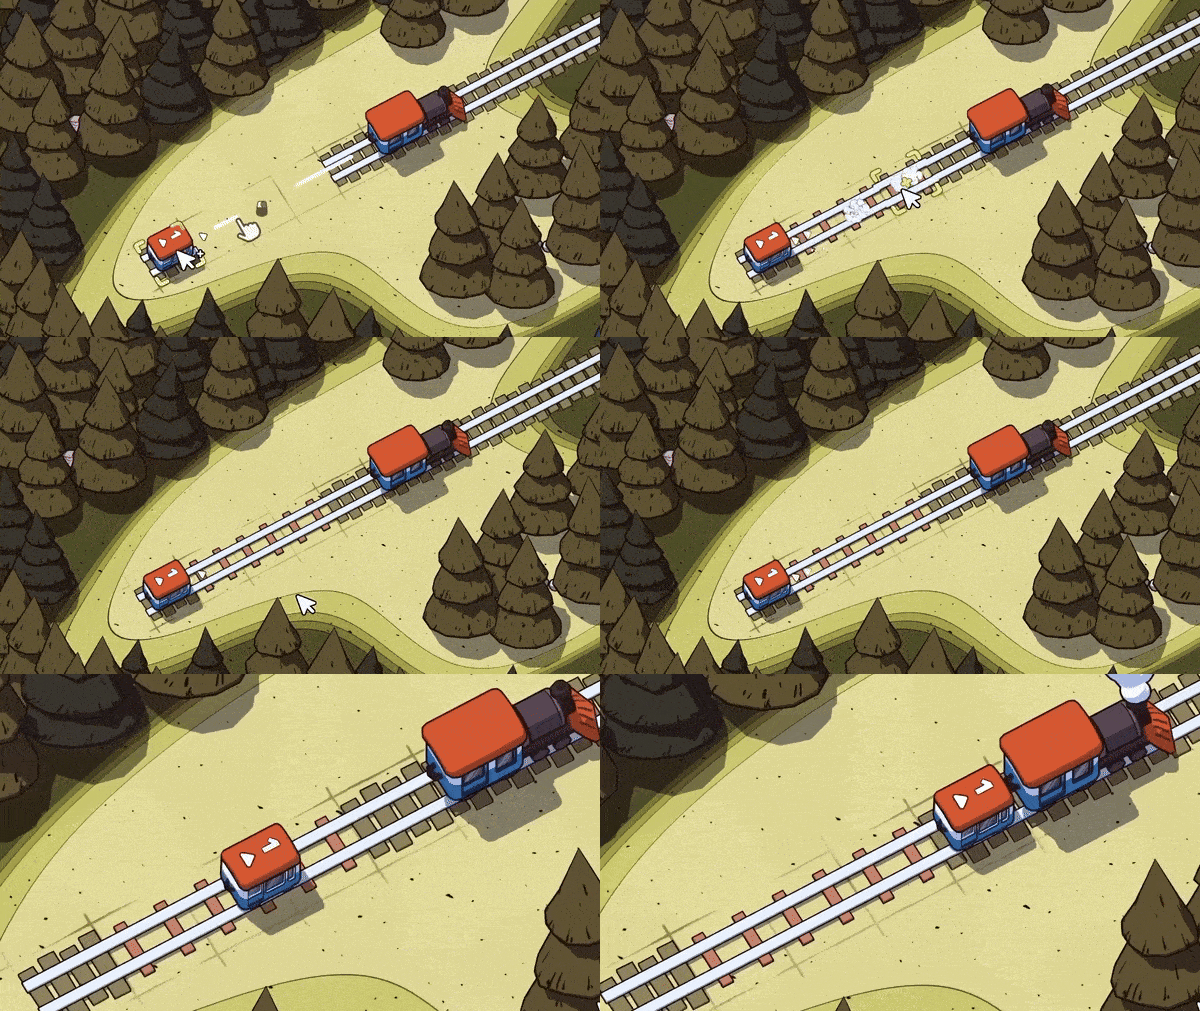
This is the same approach that “Railbound” takes. Even if the first levels are supposed to teach the players some basics, all the levels share the same goal. Always. The consistency is kept no matter how complex the levels are.
| The first level of “Railbound”. Each next level keeps its gameplay loop and the goal: connecting carriages to the engine. |
|---|
|
Prompts vs Panels
Before we follow the tutoring process from the beginning, I’d like to introduce two handy terms regarding showing information to player. A prompt, and a panel.
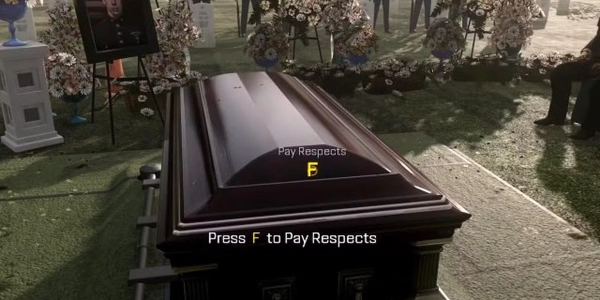
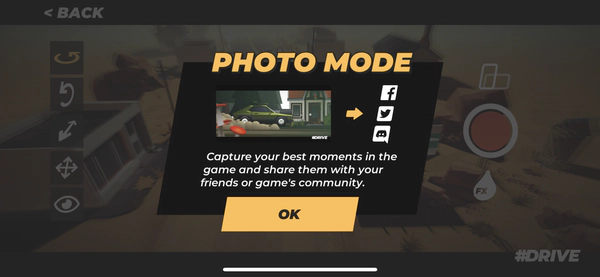
| Prompt, “Call of Duty: Advanced Warfare” | Panel, “#DRIVE” |
|---|---|
|
|
Prompt – either non-diegetic or geometric message to the player. It may contain text, icons, or both, with simple and short instructions for controls.
Panel – usually a non-diegetic (but sometimes geometric) overlay aimed at explaining more complex aspects of the game. It uses text, images, videos, animations, or a combination of these elements. Because a panel contains more content the player needs to acknowledge, showing it often pauses the game.
The above definitions are my own (I will use them from now on). However, I have included two terms from the literature in these definitions:
Info
Non-diegetic elements are UI elements residing in the non-fictional, non-spatial part of the design space. These are elements presented in an overlay manner.
Info
Geometric elements are UI elements presented in the 3D geometry without being an entity of the fictional game world.
I decided to include those terms in this post to highlight that prompts and panels can exist in different spaces – they can be presented in an overlay manner or can be hovering somewhere in the game world. You can also observe it in our game. The “diegetic/non-diegetic” terminology is widely used in gamedev, so those terms are worth knowing.
In “Guiding Light” we prefer prompts over panels. This is, again, because we found prompts being the simplest solution to show aspects such as controls. However, panels do exist in the game, but they serve as credits or “level completed” screen.
Controls, Goal, and Context
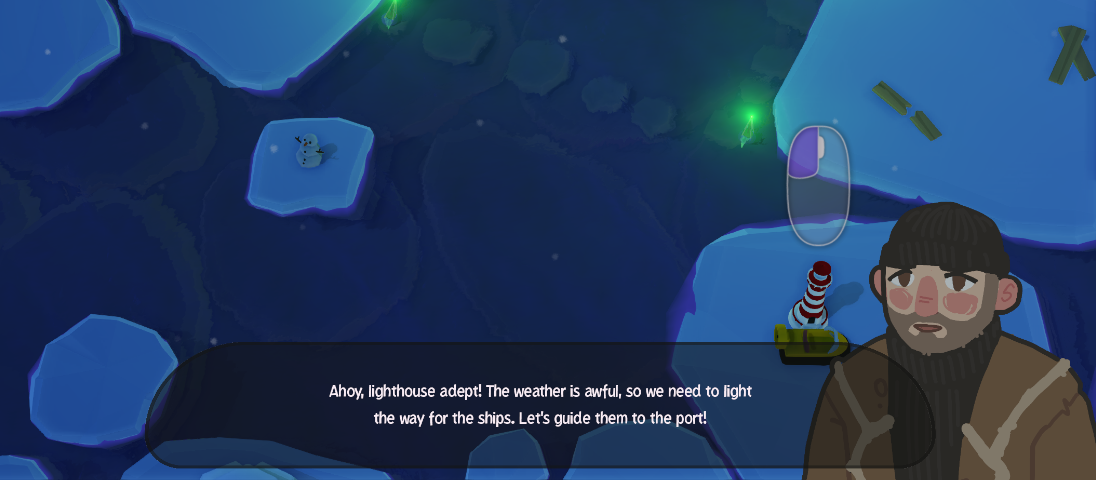
The first thing you see in the game is an old lighthouse keeper who accompanies the player throughout. He communicates using dialogue boxes with subtitles and voiceover. We chose this over an instruction panel because what the player is told matches the game lore and a speaking character is multisensory (text + audio).
Conclusion
Our playtesters absorbed multisensory information better. A short call to action with text and voiceover was more effective than a panel with raw text information.
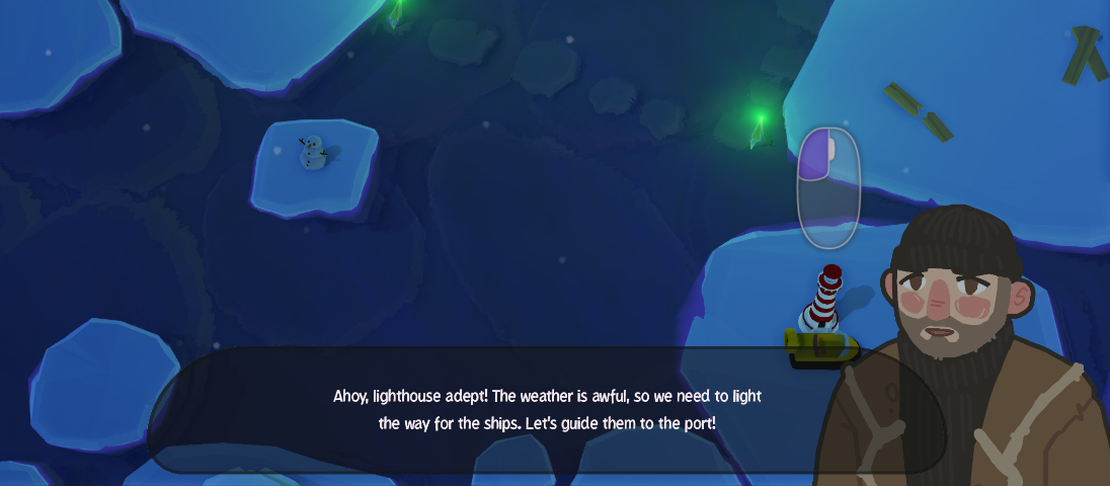
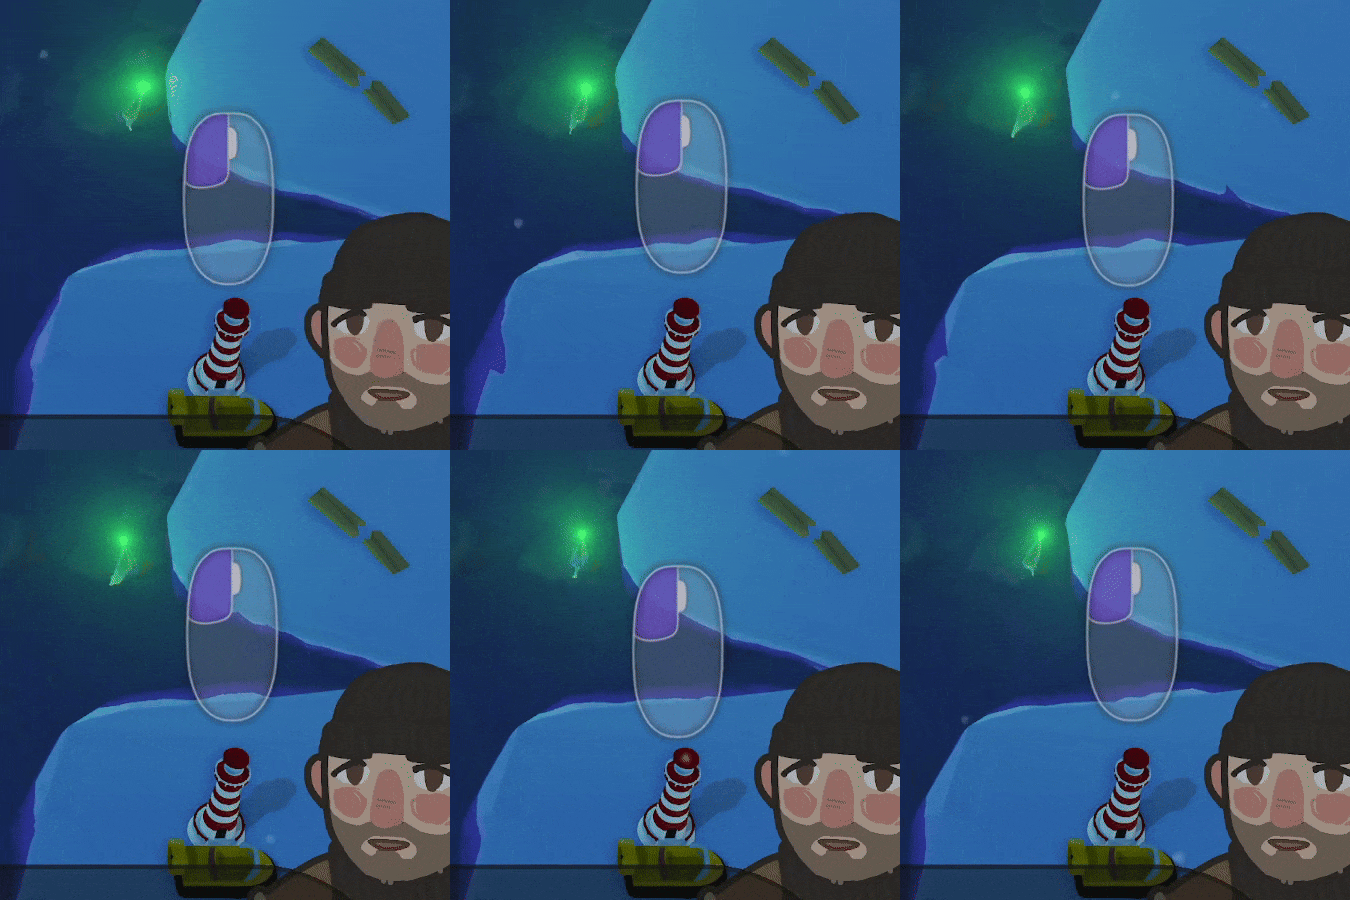
There is also a floating prompt with mouse icon (left mouse button highlighted) to indicate that the player needs to press it for something to happen:
Conclusion
If a button prompt appeared out of nowhere and attracted attention, players pressed it.
“Ahoy, lighthouse adept! The weather is awful, so we need to light the way for the ships. Let’s guide them to the port!" What do the players learn from this voiceline? The goal and the context of the game.
What do I need to do? I need to guide the ships.
But why? Ah, because the weather is awful.
The Left Mouse Button is always used to start the level by turning the light on. From the main menu, players already know that the mouse is used to move the beam. There are no direct instructions or mentions of illuminating the ship – everything is embedded in the game’s lore. Our playtests showed that players easily figured out how to illuminate the way in front of the ships, and therefore, control them.
Stopping Progress Until Players Use the New Mechanic
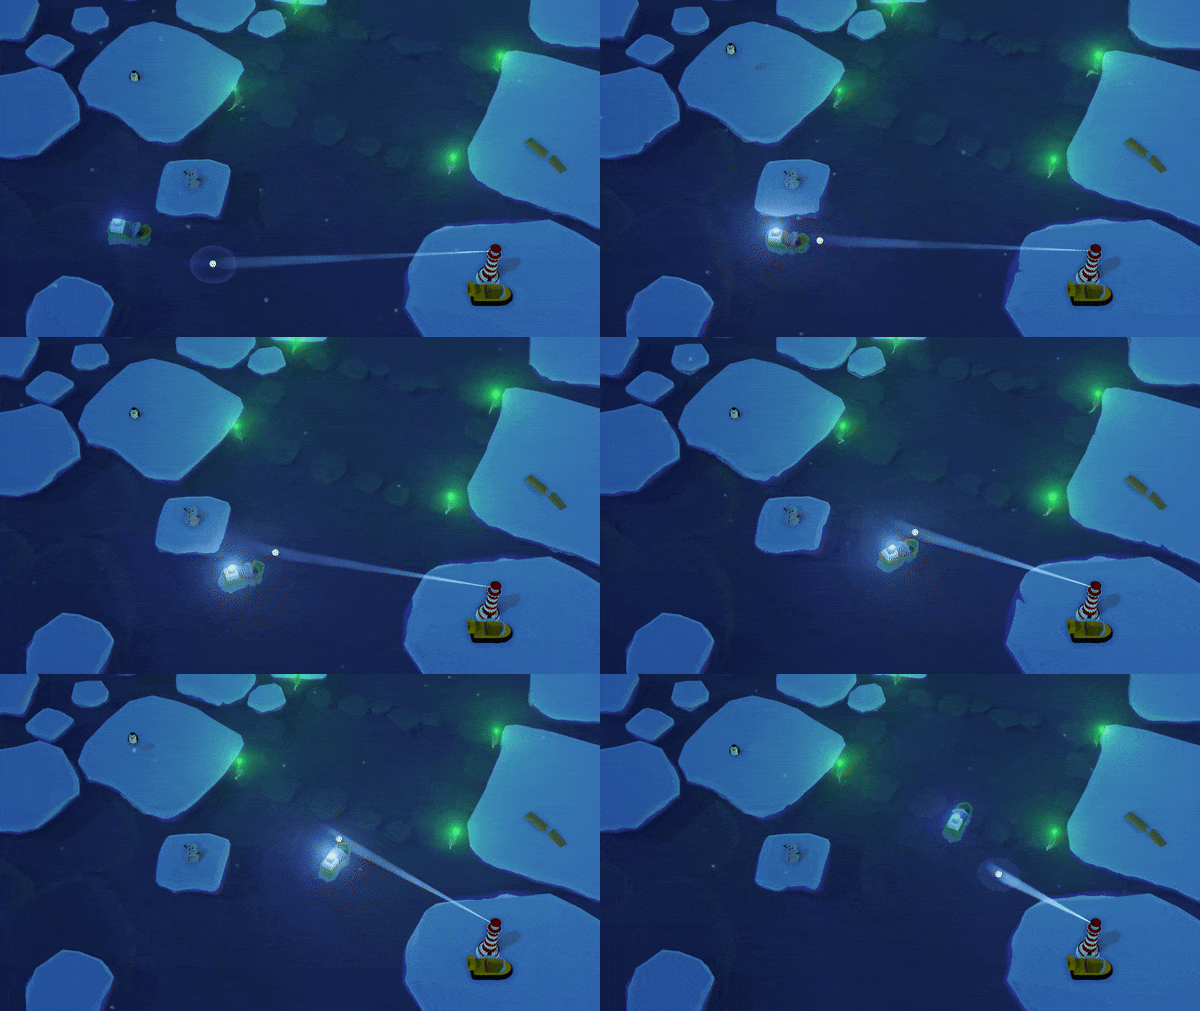
The next element of tutoring is embedded into the level design. It’s crucial for players to “feel” the ships at this point. The most important things they need to learn are how to turn the ships, slow them down, and make them accelerate.
The shape of the canal requires players to make a turn. Therefore, they need to successfully turn to reach the destination – the port. This leads to an idea we loved in terms of introducing new gameplay mechanics:
Conclusion
If we gave the players something new, it was good to lock them with this new thing, and make them use it to get out.
In “Guiding Light” we ensure that you learn how to control the ship when you pass the first canal – curved enough to require you to turn and wide enough to give you a peaceful space to learn. And even when the ship gets crashed, a new one flows in quickly.
As a supplemental example of preventing progression until the players use a new “toy”, let’s take “Hollow Knight”, a challenging action-adventure metroidvania. At the beginning of the game the players can earn a “Vengeful Spirit” spell that launches a projectile hurting enemies. A little further in Ancestral Mound there is a passage guarded by Elder Baldur. This enemy cannot be hurt with a nail (melee) attack, so in order to progress (beating this particular enemy is mandatory) the players need to defeat the Elder Baldur with the “Vengeful Spirit”.
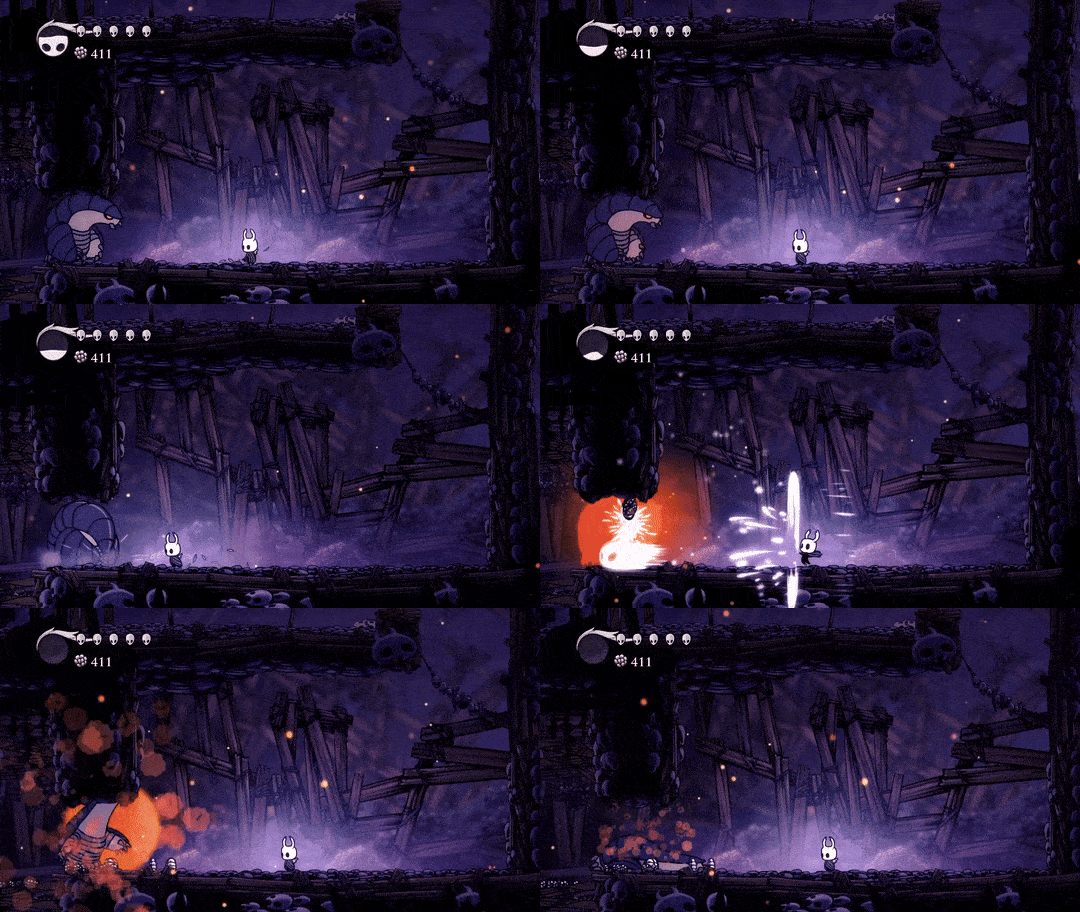
This way, developers made sure players know how to use this spell and will be able to utilize it later too.
Dots and Connections
Let’s go back to our canal and the ship. When it arrives to the port, the old lighthouse keeper calls again:
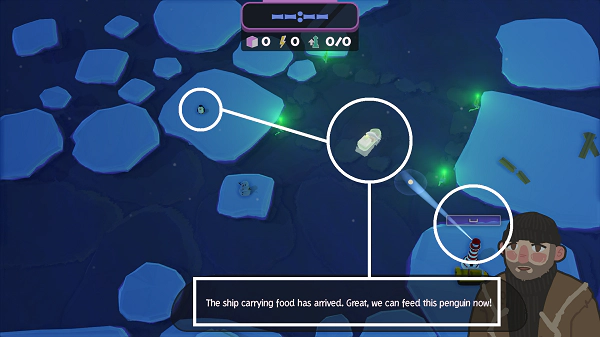
There are multiple things happening:
- the voiceline: indicates that the ship with food has arrived and that the penguin can be fed
- the space button prompt: shows that we should press this button
- the blinking ship: attracts attention and highlights that we should interact with it in some way
Note
By the way, after we press Space, we leave the lighthouse and are able to control the hovercraft with WASD keys:
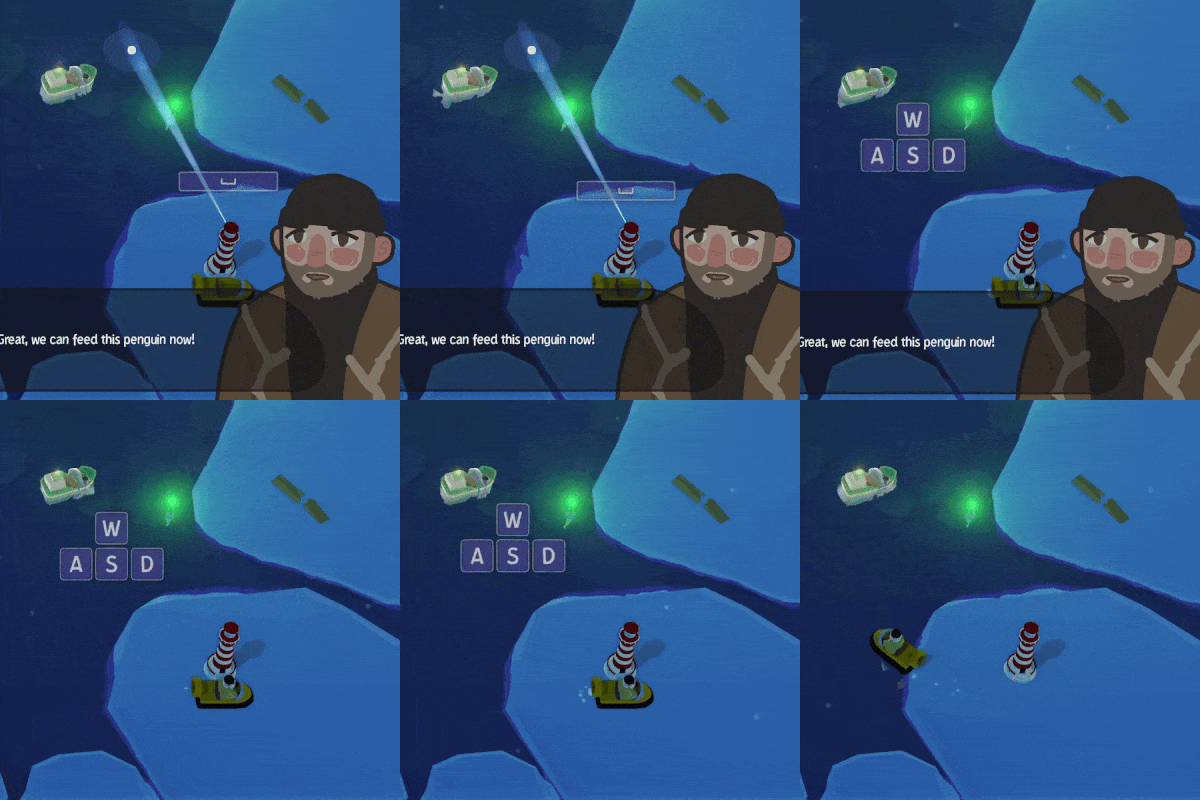
We presented these pieces of information as “dots” and let the players connect them.
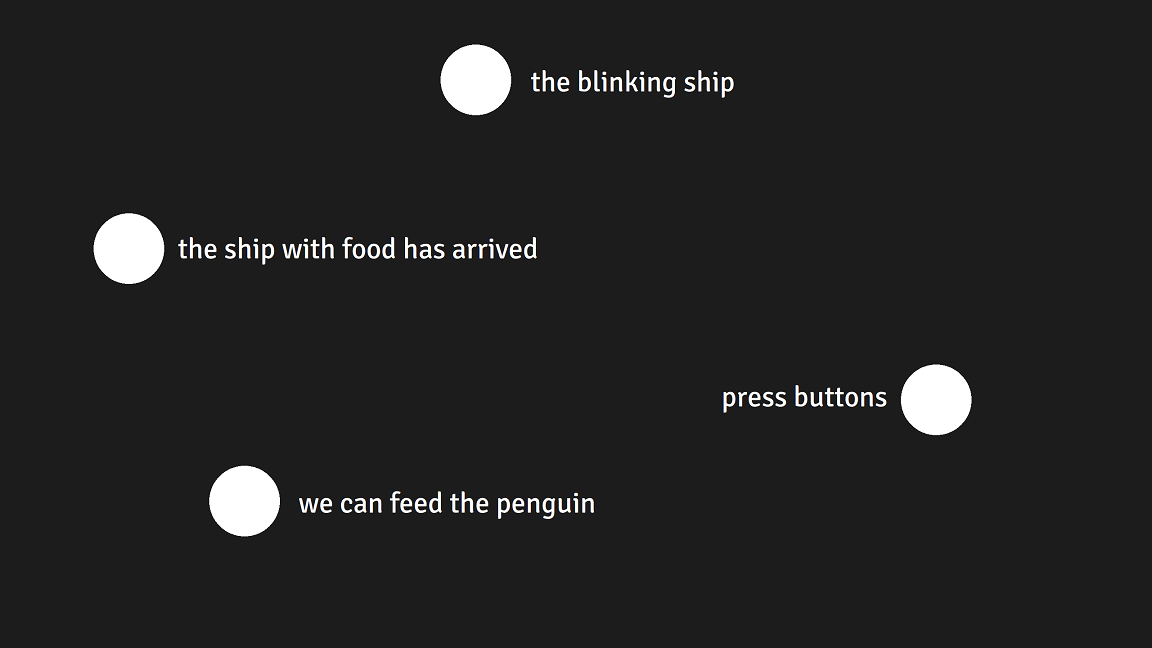
Turned out that in this level it was delivered clearly enough, so our playtesters managed to discover the connections between pieces of information easily:
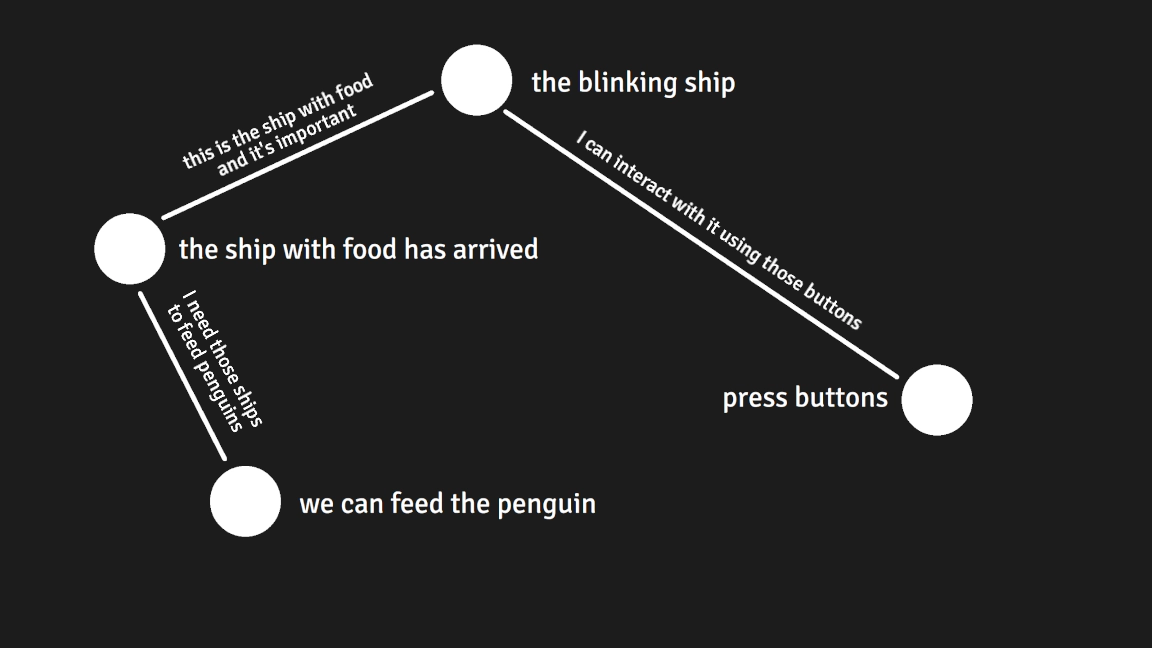
In this case, we built enough context and presented what needs to be done in a peaceful environment. Players did what we wanted and we preserved a minor “Eureka!” feeling.
Conclusion
Showing players what needs to be done with enough context, instead of giving them step-by-step instructions, worked for us.
And to achieve this we used:
- a voiceline with text and audio
- button prompts
- a blinking effect on a ship
What’s more, connecting dots wasn’t like “solving a puzzle”. Players didn’t need to stop for a while to figure out what to do. It was natural and this was our desired experience. At the end of the level, you see a fish being thrown to the penguin, which then happily jumps into the water. This provides instant feedback and serves as a reward, indicating that we performed as the game intended.
Explaining More Complex Systems
“Guiding Light” has also two more introductory levels. The player is taught there with mostly what I’ve already covered, even in more complex cases. Were we successful in those cases? I’ll answer that at the end of the article. Now, there are more gameplay aspects that need to be explained:
- a new type of ship: with fuel – this is a sort of a “currency” that players can collect an spend either on upgrading the lighthouse or buying the “flash” ability
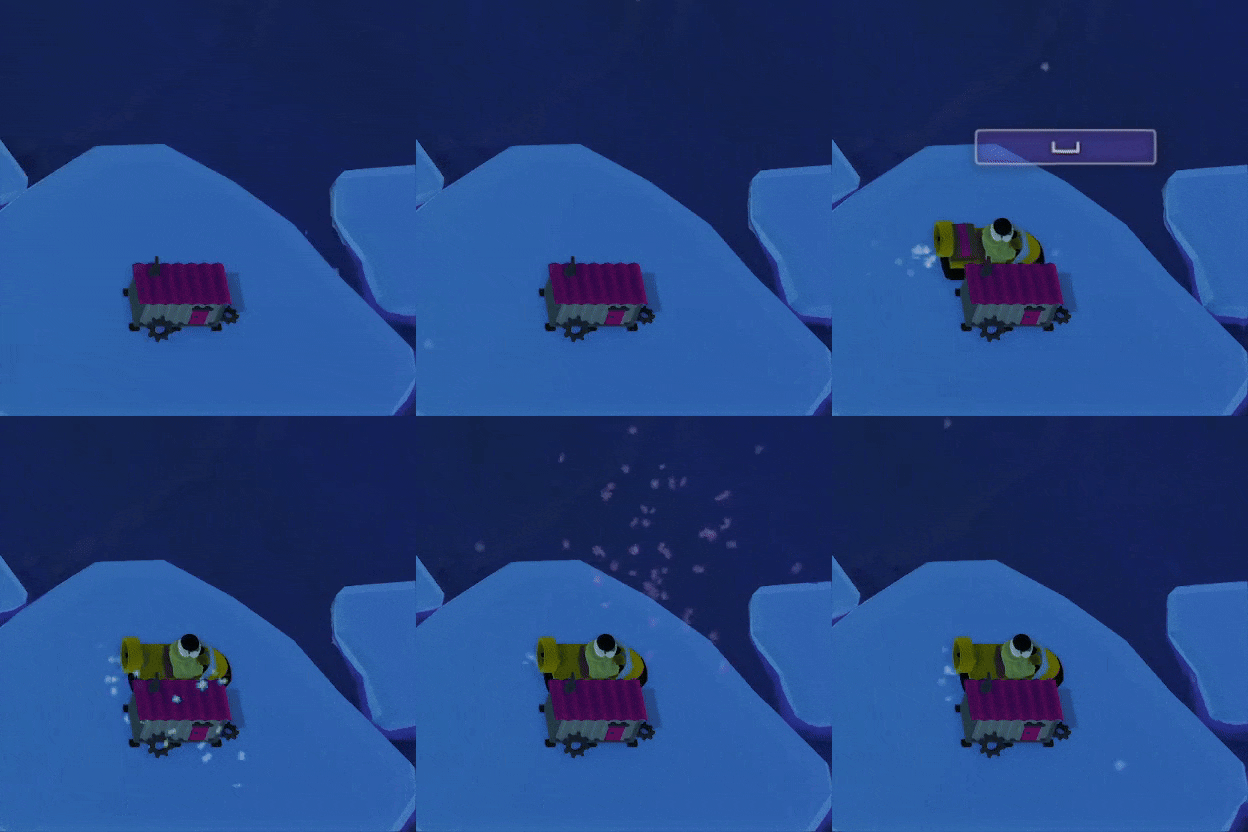
- upgrading the lighthouse – by spending the packages in the workshop, we can make the light beam brigther and wider to make the ships more responsive
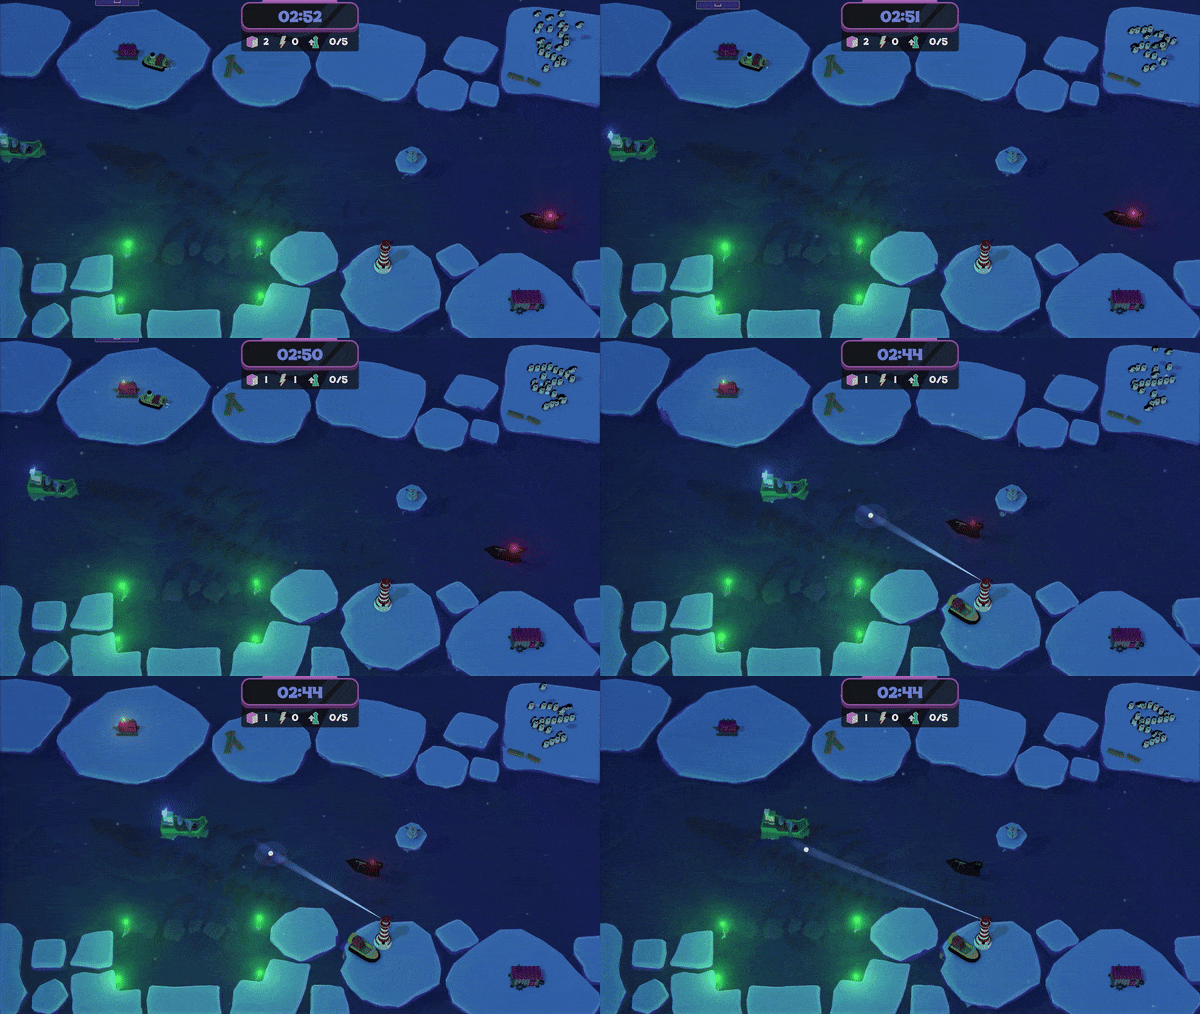
- the flash – by spending the packages in the generator, we can obtain an ability to stop all the ships in the canal for a while
- the pirates – they attack all the friendly ships!
| The “Flash” Ability | A Pirate Ship |
|---|---|
|

|
| A Ship With Fuel | Upgrading The Lighthouse |
|---|---|

|
|
Firstly, we need to explain a new type of ship that we must guide to the port, similarly to the food ship. However, with this ship, we obtain and keep the package as “currency”.
To teach this, we use:
- voiceline (text + audio)
- prompts
- blinking effect
This is how the situation looks after it arrives to the port:
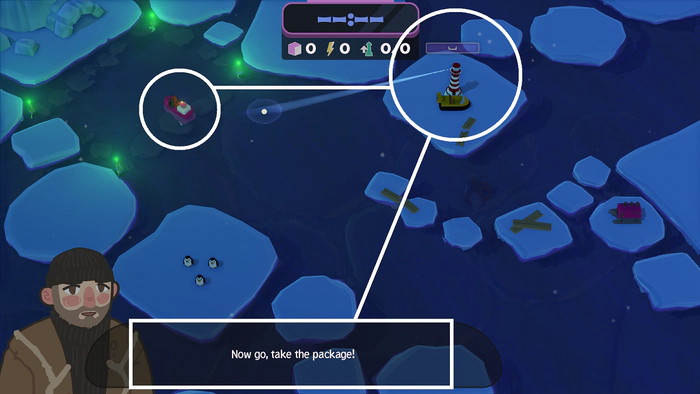
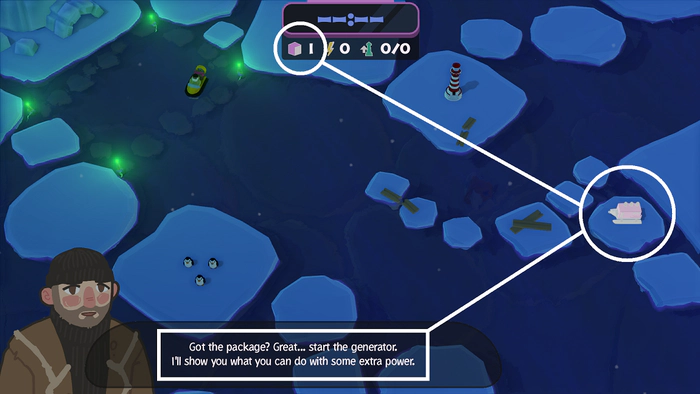
We hear “Now go, take the package!”. As this is accompanied by space button prompt, and the players have already taken one package in the previous level, it is easy for them to figure out what to do. After that we use another voiceline together with a blinking effect on the generator that is needed to obtain the “flash” ability:
To complete this level while maintaining the gameplay loop, we need to feed the penguins by guiding a food ship. This time, however, we face a huge ship! The flash ability is crucial here – it allows us to stop and turn the large ship. But how do we learn it?
We, the developers, again aim to “lock the players with a new mechanic and make them use it to progress.” The upper part of the canal is so narrow and curved that it forces players to use the new ability to stop the ship. To assist them, we provide a QTE-like prompt:
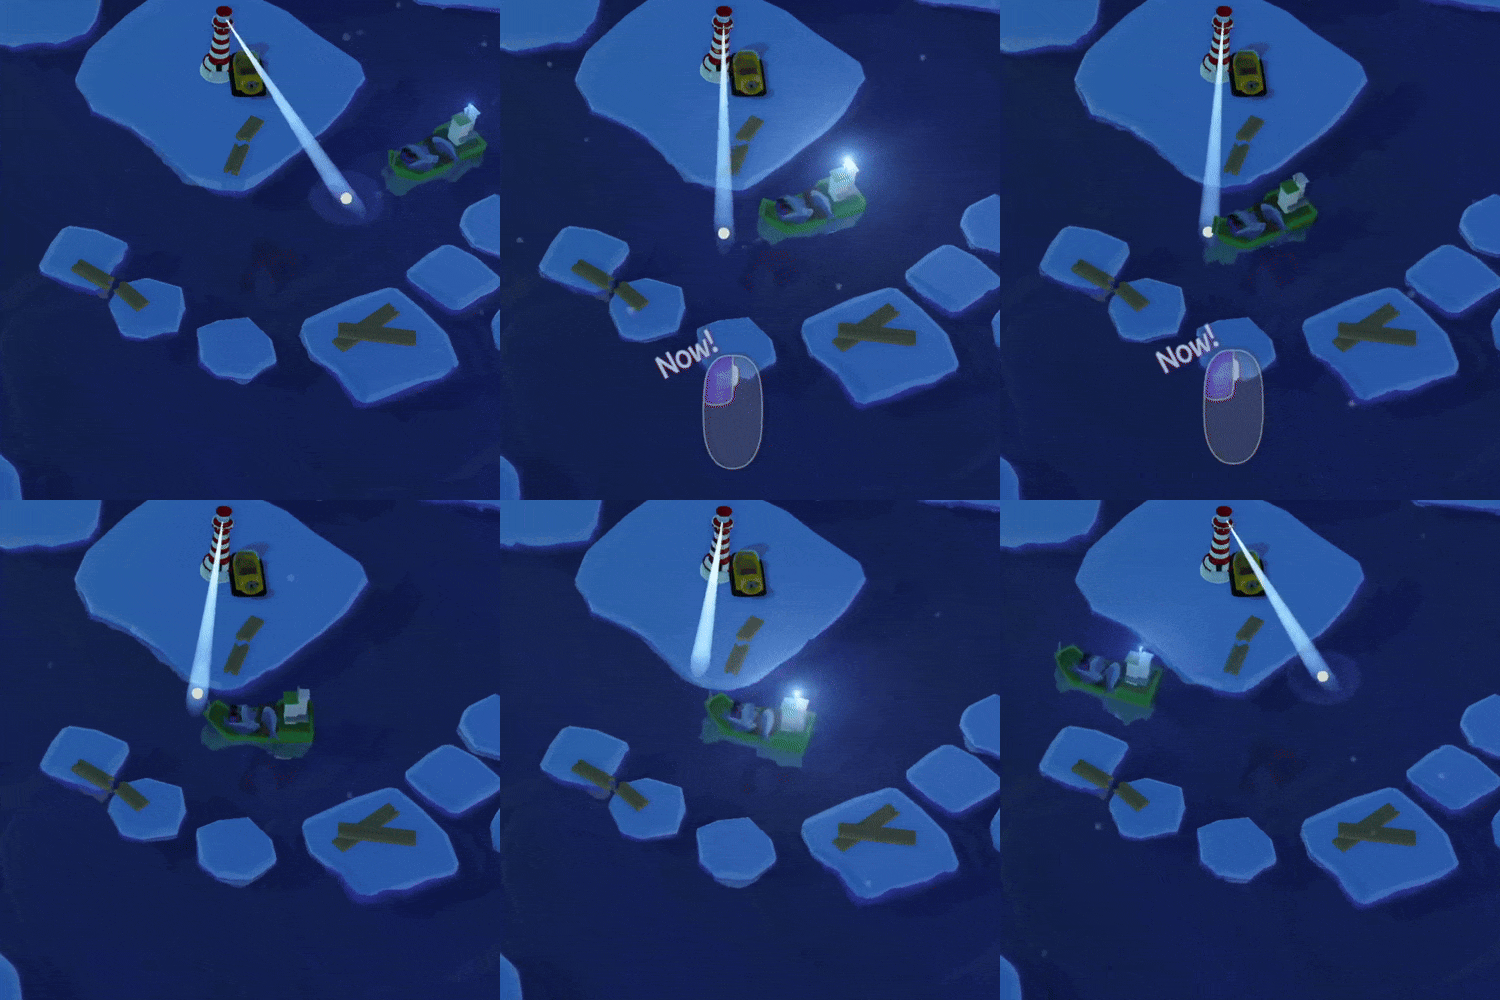
After they succeed, we provide feedback with a voiceline:

The level is finished after we guide this ship to the port and feed the penguins (consistent gameplay loop).
The same techniques are used in the third introductory level to explain upgrading the lighthouse. However, another gameplay aspect – pirates – provides an opportunity for a different tutoring technique. We used the following technique not necessarily to teach, but to make tutoring more enjoyable:
Leaving A Surprise To Discover
When pirates appear in the third level, this is what the players are told:

Note that the players are not being told how to destroy the pirate ships. The most intuitive way of doing this is… guess what – guiding the pirates onto ice floes.
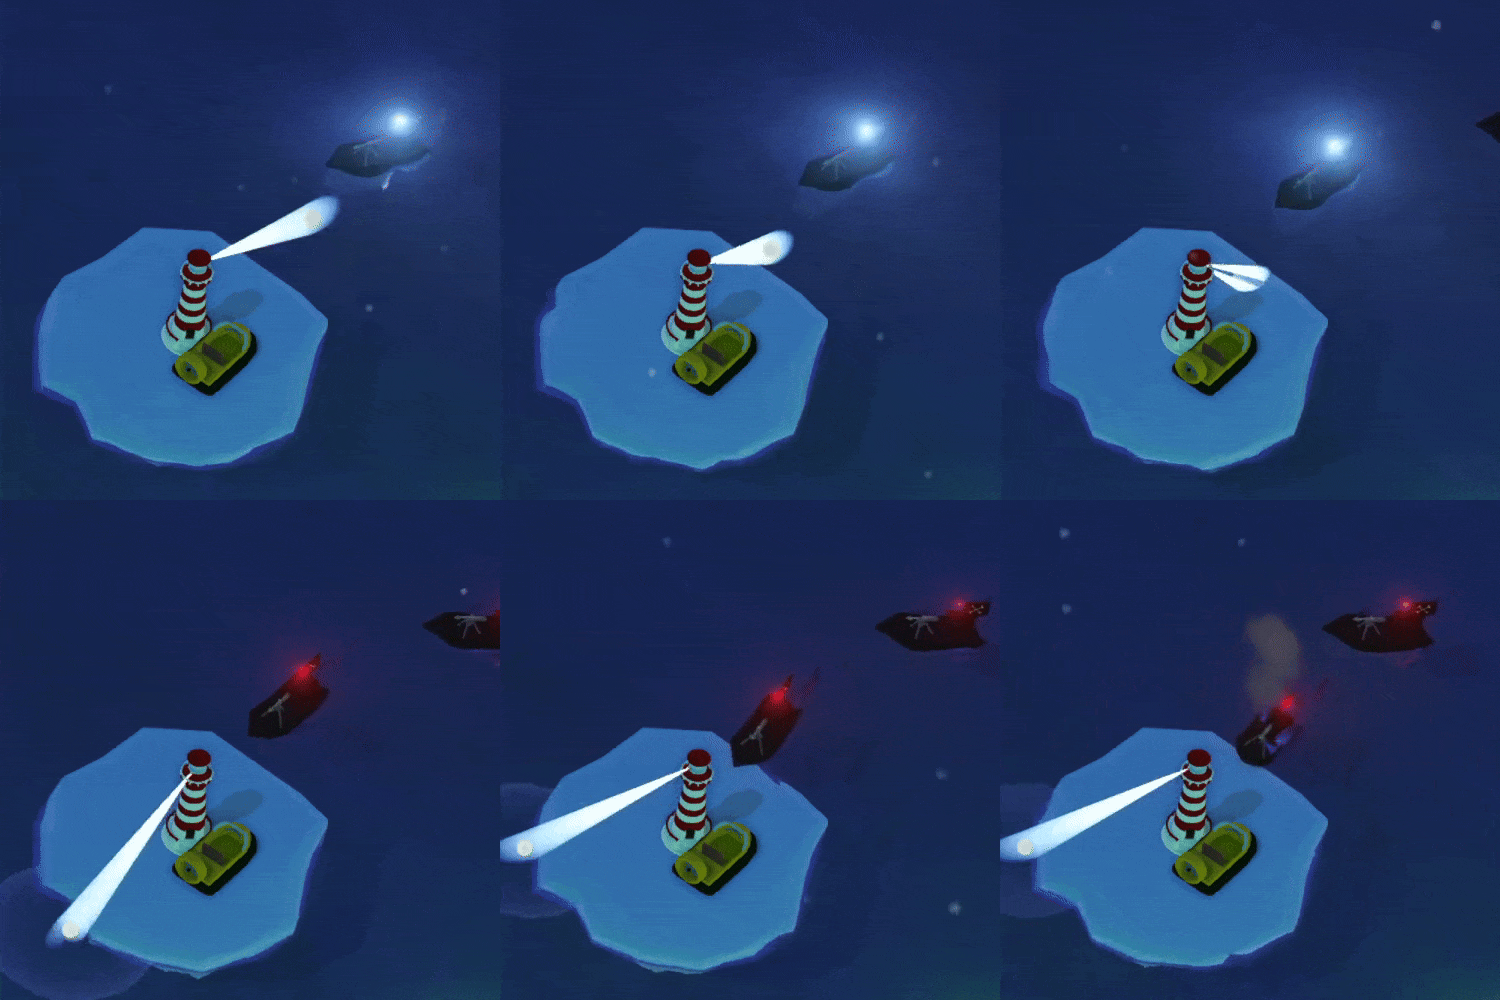
But players can leave the lighthouse! Have you considered what might happen if we bump into ships with our hovercraft? This:
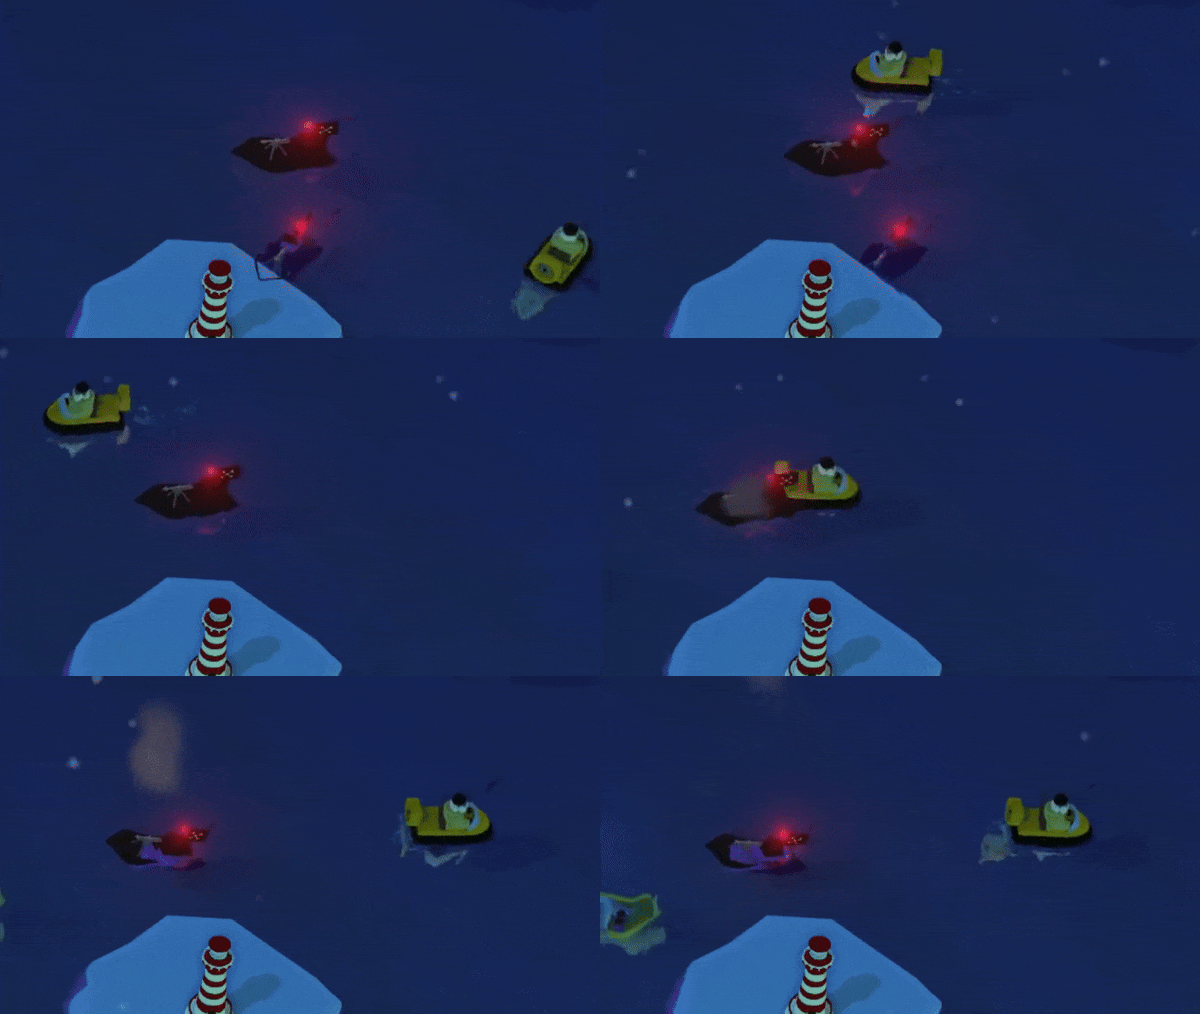
Why we decided to keep it a secret:
- Not everyone will discover it: While some may see it as a drawback, this creates a slightly different experience for each player, which we can allow. It’s a minor detail that doesn’t impact victory. Watching someone else play and discover this feature leaded to several reactions like, “Woah! You can do that?!”
- It creates an “Eureka!” moment: Players had an “Aha!” moment when they realized, “I can bump into ships too!”
- Unexpected and funny situations: While bumping into a friendly ship might not be ideal, it’s fair. During playtests, one player left the lighthouse early in the second level and accidentally destroyed a food ship. He laughed and said, “I literally crashed into it, what did I expect?" This is similar to players testing if fire causes damage in a game, and being surprised when it does (it usually does 😉).
However, we had to be careful with it. We knew that we shouldn’t hide any crucial information from players. For example, keeping secret which buttons to press to move would probably not be fun.
Conclusion
It was worth it to come up with “a minor thing to discover”. Optional for players to perform well, but satisfactory enough when they discovered it. It created a few hilarious emergent gameplay situations.
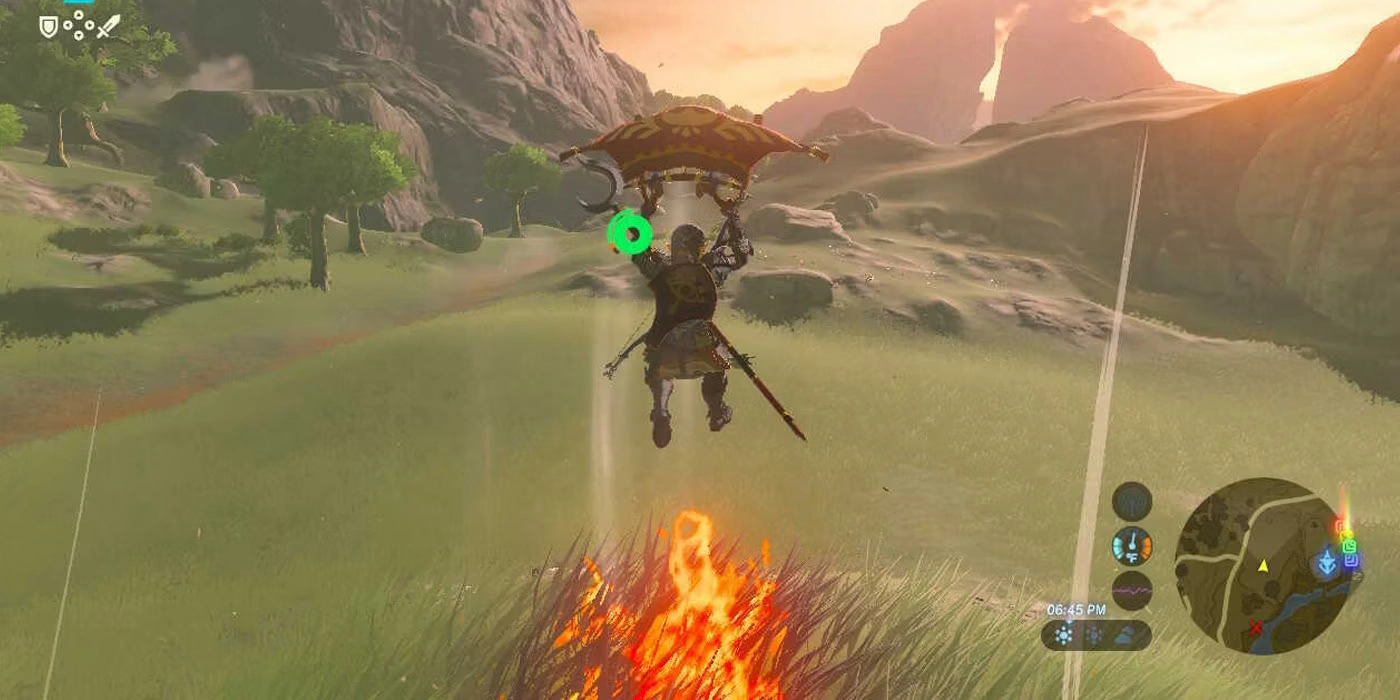
My favorite example of a game using this technique is “The Legend of Zelda: Breath of the Wild”. If you played this game you might know that warm air (heated by a burning grass) can make your paraglider elevate. Someone designed this and made it a secret intentionally. This is why discovering such things in “Breath of the Wild” makes so much fun!
| Link’s paraglider being elevated with warm air. |
|---|
|
What Could Be Done Better
While our team is quite satisfied with how tutoring in “Guiding Light” fared, I’d like to highlight one thing that really bothers me. The “flash” mechanic and upgrading lighthouse were supposed to be the main pillars of expanding gameplay and making it something more than just guiding ships. We feel that these elements could have been explained better. But a deeper analysis led us to a conclusion that it’s not necessarily the problem of “tutoring directing” that misfits, but rather a general UX and (mostly) UI problem.
Conclusion
We understood that tutoring needs to be followed with a well-thought out remainder of UX elements, and a clear and intuitive UI too.
| A main UI element presenting: time until the level ends, number of packages, remaining flashes, and lighthouse level. |
|---|
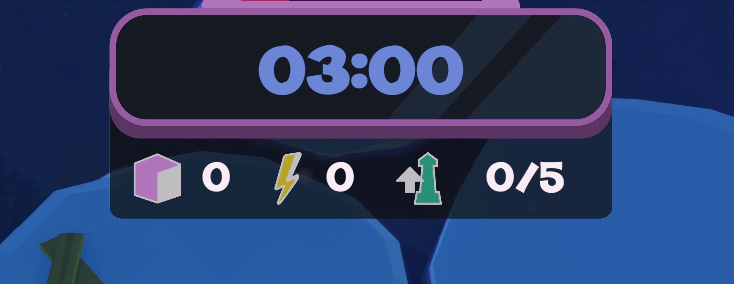
|
The main element of our interface is, indeed, functional and serves its purpose, but feedback we got indicated that it could be designer more clearly. For example, we could revamp the icon and text colors to make particular indicators easier to identify. We could, perhaps, transfer number of packages or lighthouse level to game world and locate the icons next to objects related to those UI elements. We also have suplemental diegetic indicators for lighthouse level, number of packages, and remaining flashes, but they were quite difficult to notice in dynamic gameplay. I’ll leave it as an exercise for you to discover them yourself!
What’s funny, we knew that design of our UI (especially its colors) can be better before presenting the game! Unfortunately, we didn’t manage to rework our UI framework to deliver a more sophisticated design before the deadline. I’d like to highlight here that “Guiding Light” uses its own, custom game engine, we had much more challenges to tackle, and we simply didn’t have time left for polishing this aspect.
Summary
A lot of effort went into designing and developing this game. That’s a credit to our amazing team delivering high quality engine, tools, rendering, and art. Designing a game’s tutorial was my job, although the whole team was engaged in the process. Shoutout to our lead designer, Miłosz who helped me with the vision of guiding players, and then made it real, programming it. I want to thank my teachers: Jarosław Andrzejczak, PhD, and Artur Ganszyniec, whose work has vastly influenced my approach to game production and design. I’m glad they appreciated the tutoring in “Guiding Light” too! 😊
Here’s a summary of our thoughts:
Conclusion summary
- Without tutoring, “Guiding Light” would be unclear and frustrating. With a traditional tutorial, it could be less fun, immersion-breaking, or cluttered with too much text.
- In some simple cases we managed to teach players subconsciously by designing the basics (such as main menu) in a gameplay-supportive way.
- If some things could be explained without a single word, we didn’t use any. We seeked the most simple solution for explaining our gameplay.
- We wanted to ensure that each level mirrors the gameplay loop. Even in “directed tutoring levels.”
- If a button prompt appeared out of nowhere and attracted attention, players pressed it.
- Our playtesters absorbed multisensory information better. A short call to action with text and voiceover was more effective than a panel with raw text information.
- If we gave the players something new, it was good to lock them with this new thing, and make them use it to get out.
- Showing players what needs to be done with enough context, instead of giving them step-by-step instructions, worked for us.
- It was worth it to come up with “a minor thing to discover”. Optional for players to perform well, but satisfactory enough when they discovered it. It created a few hilarious emergent gameplay situations.
- We understood that tutoring needs to be followed with a well-thought out remainder of UX elements, and a clear and intuitive UI too.
Sources & Additional Materials
- “Sequelitis - Mega Man Classic vs. Mega Man X” – an analysis of “Mega Man X” tutoring – the most seamless tutorial you will ever see. Must watch!
- Beyond the HUD: User Interfaces for Increased Player Immersion in FPS Games: Master of Science Thesis
